Merge fields
Merge fields are used to grab related data and dynamically merge it in to a text field. For example when you want to send a survey out to hundreds of recipients, and you have all their first names. You may want to start your email or SMS with Hi John or Hi Lisa if two of your respondents is names John and Lisa of cause. This is done using Merge fields. We display them like this {FIELDNAME} so that is a start and end curly bracket, with the field name inside.
Caution
If you use merge fields in SMS surveys, note that each SMS segment can only contain 160 ASCII characters 80 if the characters are unicode. The length of the content generated using a merge field vary with the content you provide for the given field and may result in excessive SMS usage.
How to use example

List of possible fields
We can only fill in merge field data if you provide it to us. So before you fill your campaigns with all sorts of mergefields, please make sure that the integrations you use or the excel files you uploade actually contains this data. If we do not find any data for a merge field, it will simply be blank so dont worry if the data should be missing occasionally.
Respondent
| Merge field | Description |
|---|---|
| {TITLE} | |
| {FIRSTNAME} | Firstname of the respondent |
| {LASTNAME} | Lastname of the respondent |
| {DEPARTMENT} | Work department of respondent |
| {ADDRESS1} | First address line of respondent |
| {ADDRESS2} | Second address line of respondent |
| {CITY} | City of the respondent |
| {POSTALCODE} | Postal or ZIP code of respondent |
| {COUNTRY} | Country of the respondent |
| {PHONE} | Phonenumber of the respondent |
Employee
| Merge field | Description |
|---|---|
| {EMPLOYEE_TITLE} | Title of the responsible employee |
| {EMPLOYEE_FIRSTNAME} | Firstname of the responsible employee |
| {EMPLOYEE_LASTNAME} | Lastname of the responsible employee |
| {EMPLOYEE_DEPARTMENT} | Department of the responsible employee |
| {EMPLOYEE_DIVISION} | Division of the responsible employee |
| {EMPLOYEE_TEAM} | Team of the responsible employee |
| {EMPLOYEE_PHONE} | Phonenumber of the responsible employee |
| {EMPLOYEE_EMAIL} | E-mail of the responsible employee |
Company
| Merge field | Description |
|---|---|
| {COMPANY_SEGMENT} | Segment of the respondents company |
| {COMPANY_ACCOUNTNO} | Account Number of the respondents company |
| {COMPANY_INDUSTRY} | Industry of the respondents company |
| {COMPANY_EMAIL} | E-mail of the respondents company |
| {COMPANY_PHONE} | Phonenumber of the respondents company |
| {COMPANY_ADDRESS1} | First address line of the respondents company |
| {COMPANY_ADDRESS2} | Second address line of the respondents company |
| {COMPANY_CITY} | City of the respondents company |
| {COMPANY_ZIPCODE} | Postal or ZIP code of the respondents company |
| {COMPANY_COUNTRY} | Country of the respondents company |
Custom
Custom fields work a bit different. We rely on the common JSON structure to access complex data types. It is accessed almost like in javascript by seperating each nesting key with a . (dot). So the merge field name will become {CUSTOM_name.of.path}
{
    "respondent":{
        "emailAddress":"[email protected]",
        "firstName": "John",
        "lastName": "Doe"
    },
    "custom":{
        "shoeSize": 42,
        "car":{
            "brand":"Tesla",
            "color": "White",
            "model": "S"
        }
    }
}
Given the above payload to add a new respondent to nps.today you can use the custom values in merge fields as follows:
| Merge field | Description |
|---|---|
| {CUSTOM_shoeSize} | Will return 42 |
| {CUSTOM_car.brand} | Will return Tesla |
| {CUSTOM_car.color} | Will return White |
| {CUSTOM_car.model} | Will return S |
Advanced Survey Module (ASM)
If you are using our Advanced survey module you will be able to use placeholders/merge fields to add data to NPS notification, feedback App, etc.
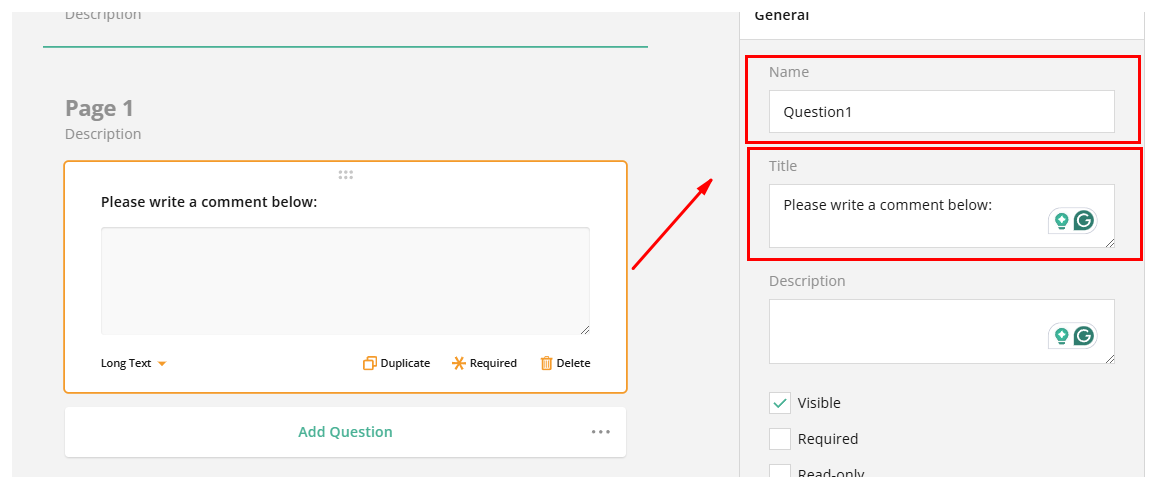
In the placeholder texts shown below Question1 refers to the Name og your ASM question.
| Merge field | Description |
|---|---|
| {ASM_Question1.title} | This will use the title of your ASM question, which refers to the question you ask |
| {ASM_Question1.value} | This will use the value of your ASM question, which refers to the answer of the |
| {ASM_Question1.displayValue} | This will use the displayValue of your ASM question, which also refers to the answer to the question you ask, but in an other format |
*You can use both value and displayValue to get the answer to you ASM question, but it is recommended to use displayValue, as it more often gives you the answer in right format
Example from ASM campaign set-up