NPS responses on Salesforce pages
This Guide shows how to set up a Flow in Salesforce, that adds NSP Responses on the Account Page. This guide should be use as an inspiration on how to show NPS Responses on Salesforce pages in general.
This is a generic guide, which means that the Salesforce Flow can variate depending on how your Salesforce organization is set up.
Additional individual rules and conditions can be necessary in order to make the Salesforce Flow compliant with your setup in Salesforce.
Create a lookup on the relevant Object
Navigate to Setup -> Object Manager -> choose the NPS Response object -> Fields & Relationships.
Now create a New Field:

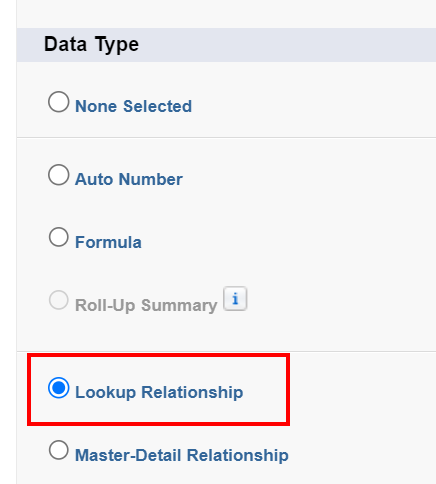
Step 1 - Make the Field the data type Lookup Relationship - click Next.
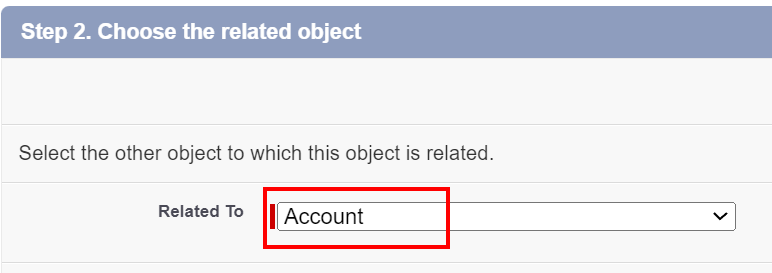
Step 2 - Now select the relevant object - click Next.
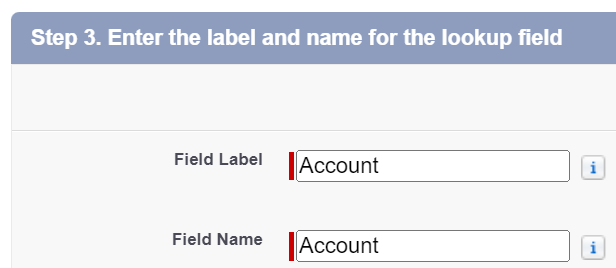
Step 3 - Fill out the Label and Field name as you want – click Next.
Skip step 4 & 5 by clicking Next on both.
On step 6 click Save.
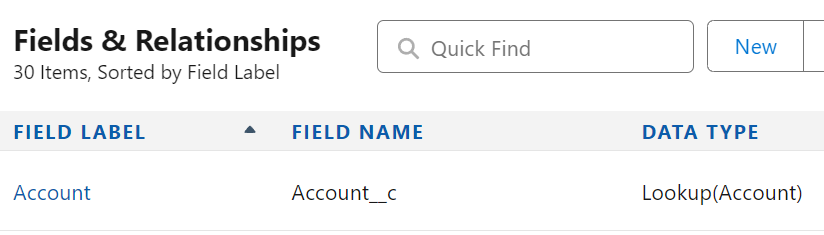
We now have created a Custom Field on the NPS Response object named “Account__c” that has a lookup data type on Account.
Creating the Salesforce Flow
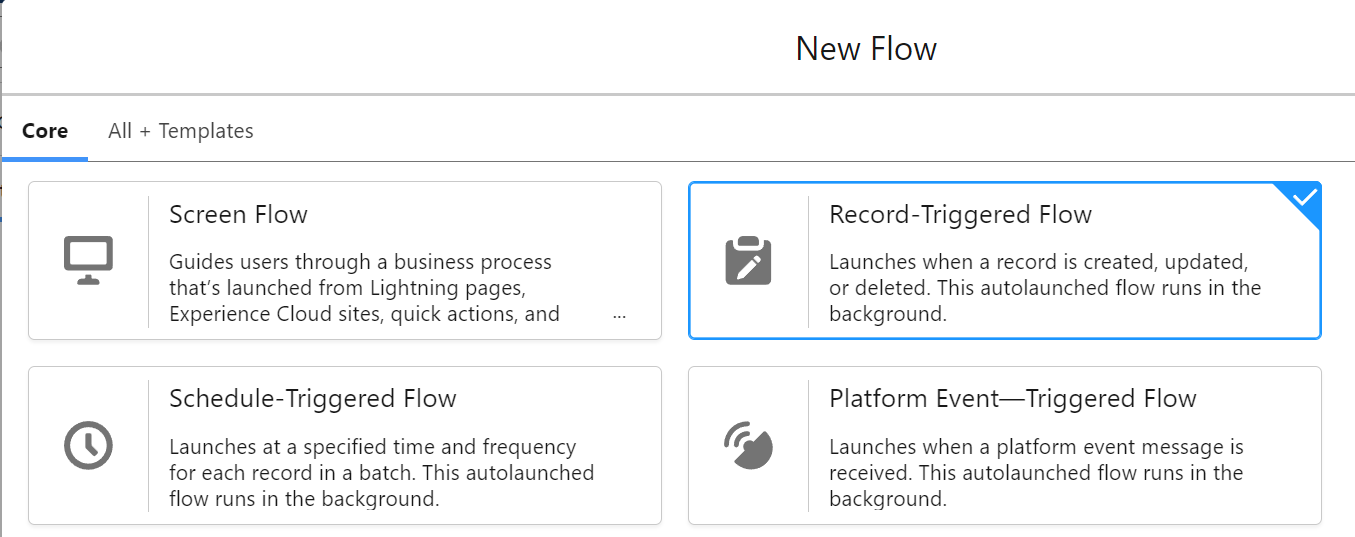
Navigate to Setup -> Process Automation -> Flows.
Click on New Flow.
Make it a Record-Triggered Flow – click Create.
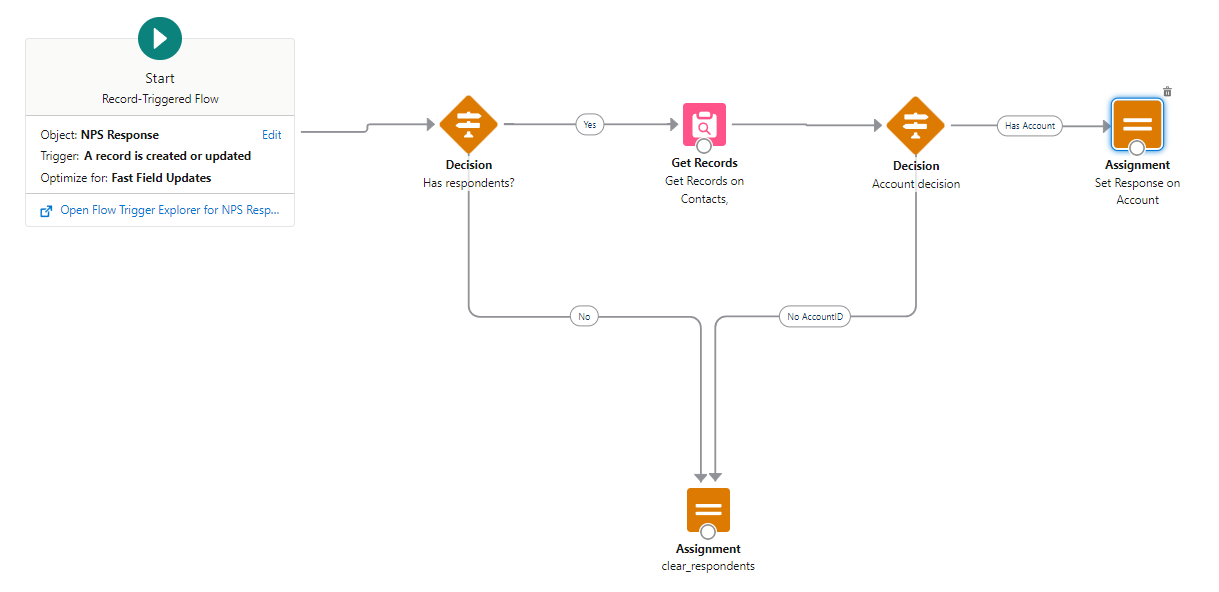
The start trigger
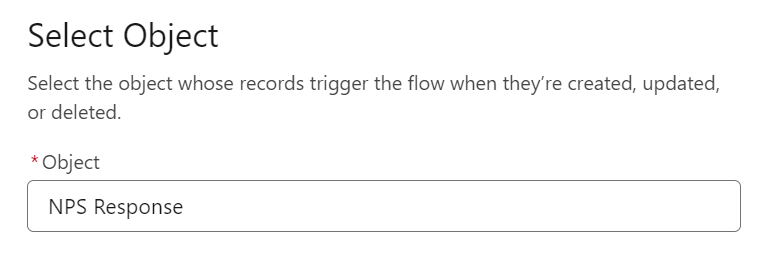
Start by configuring the Start Trigger.
Choose the object of the start trigger - NPS Reponse
Trigger the Flow when: A record is created or updated.
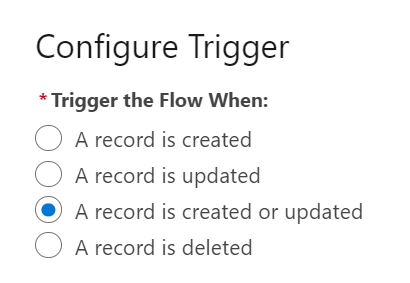
Conditions Requirements = None
Optimize the flow for Fast Field Updates.

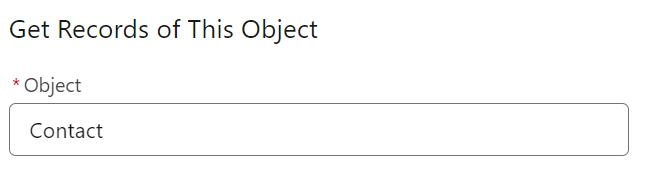
Get records (Contacts)
We now need to Get Records on Contacts, that are related to the NPS Response.
Drag the Get Record to the Flow Table and double click it.
Name the Label and the API name accordingly.
Choose Contact as the Object.
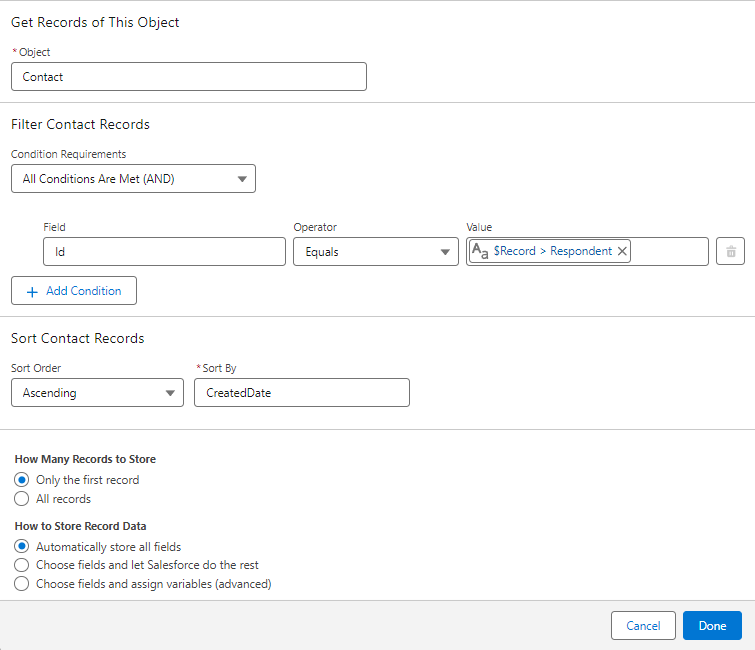
Set up the rest as shown below – click Done.
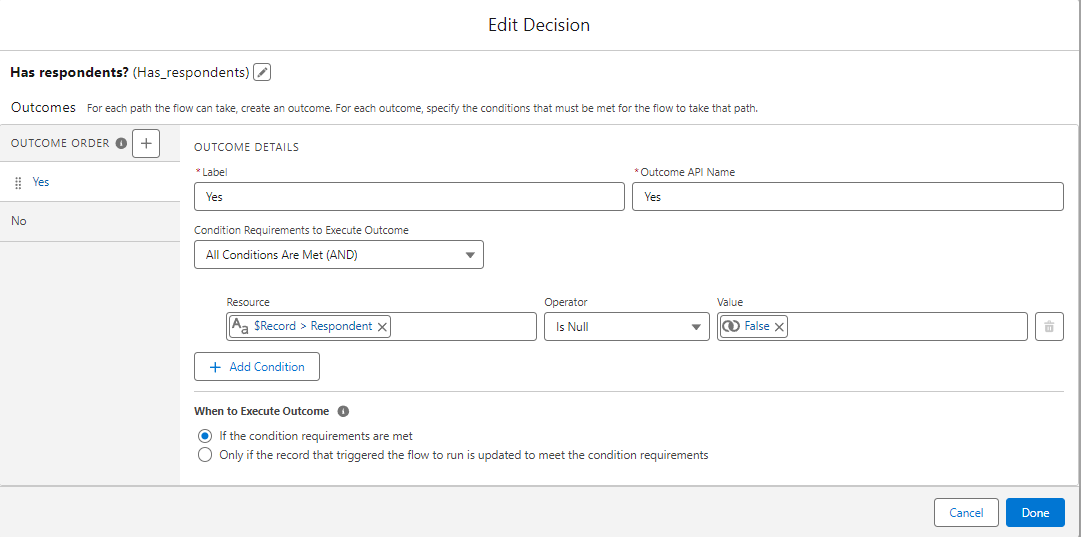
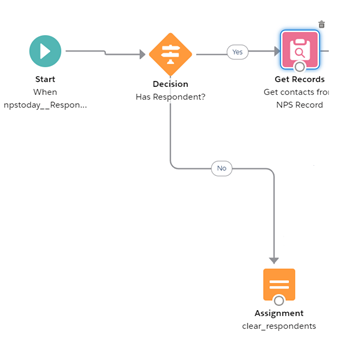
We now need add a Decision, that ensures that we clear the Respondent if the Respondent data is empty. This will prevent the Flow to fail. Drag the Decision Logic the the Flow tabel between Start and Get Records.
Double click the Decision, name the Label and API name accordingly and fill out fields as shown below - – click Done.
Here the Default Outcome is renamed to “No”.
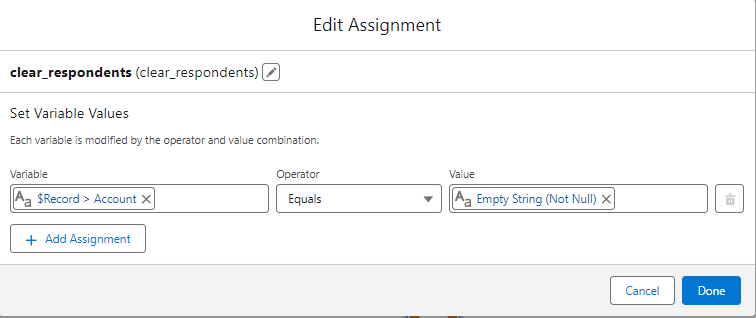
Now we need to make an Assignment that clears the Respondent if the outcome of the above Decision is “No”.
Drag the Assignment Logic to the Flow tabel, double click it, and name the Label and API Name accordingly.
Set the Fields as shown below – click Done.
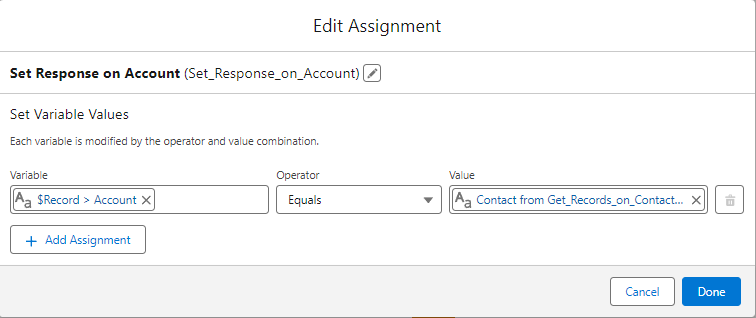
*Notice that we use the Custom Field “Account__c” that we created earlier.
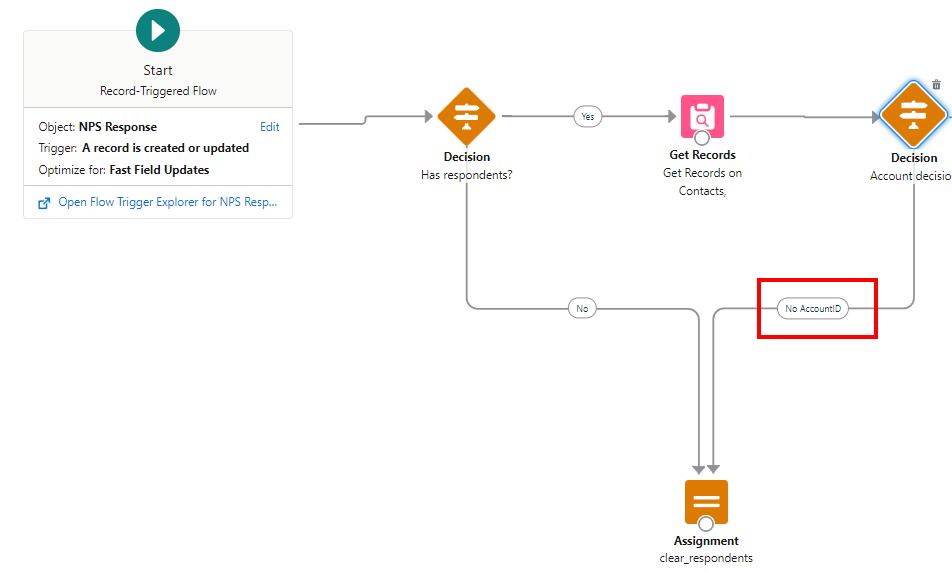
Now set the Flow tabel as shown below.
Assigning the NPS Response to related Acoount
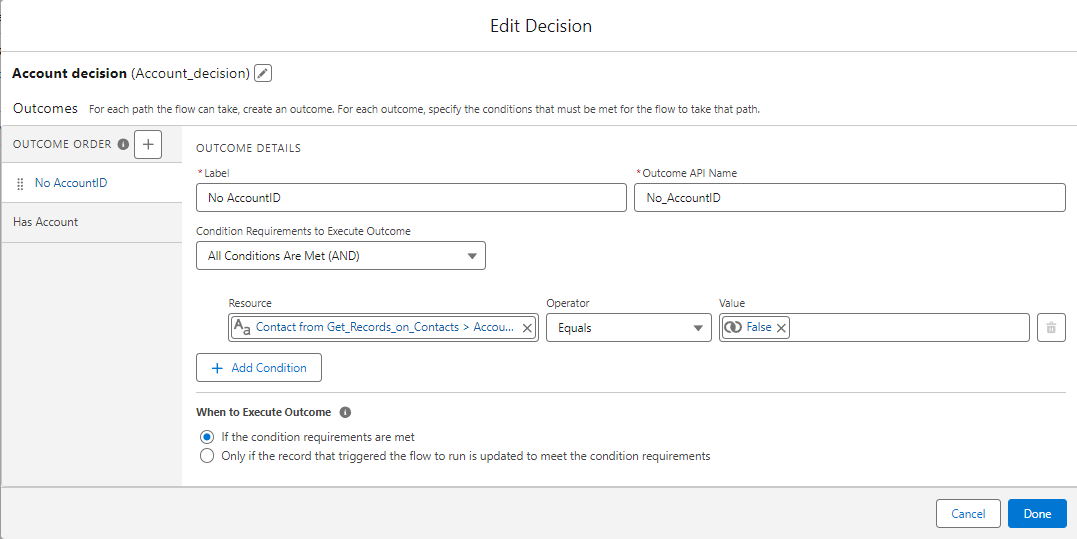
After Get Record we need to add a Decision, that clears the Respondent, if the Contact has no related AccountID.
Double click the new Decision, name the Label and API Name accordingly and fill out fields as shown below – click Done.
Drag the No AccountID arrow to the Assignment, that clears the respondent.
We now need to add an Assignment, that relates the response of Contact to the Account, that the Contact is related to.
Drag the Assignment Logic to the Flow tabel and double click it and name the Label and API Name accordingly.
Set the Fields as shown below – click Done.
Drag the “Has AccointID” arrow from the lates Decision to the Assignment above.
Now the Flow tabel should look like below.
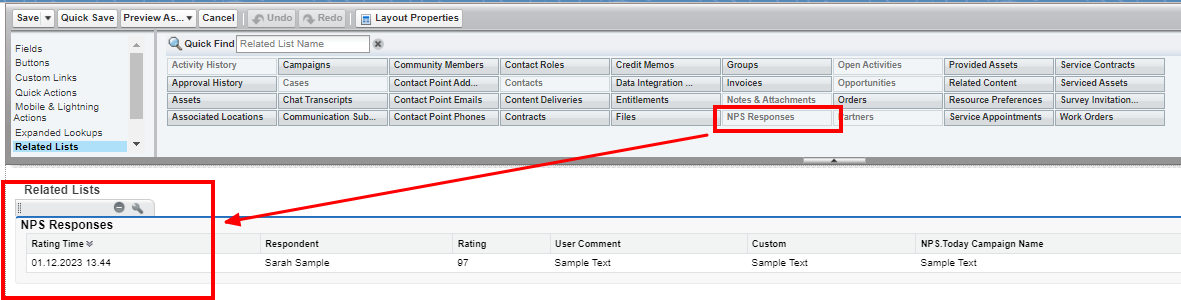
Adding the NPS Response to the Account page
Navigate to Setup -> Object Manager -> choose the Account object -> Page Layout -> Account Layout.
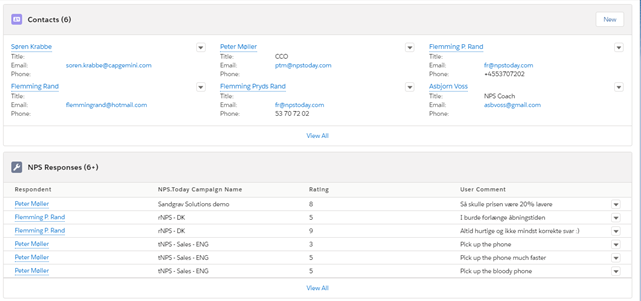
Your Account Layout now have Related List called NPS Response.
Drag it down and place it accordingly.
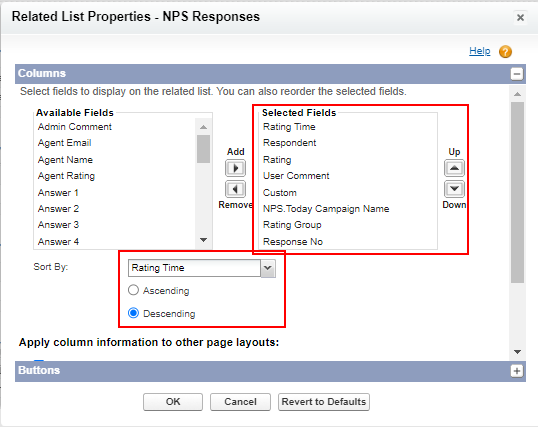
Press here on the NPS Response List the to add properties.
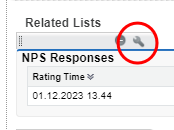
The following are recommended as a good default starting point.
Put the selected field in the order you want here.
Press OK and Save the Contact Layout.
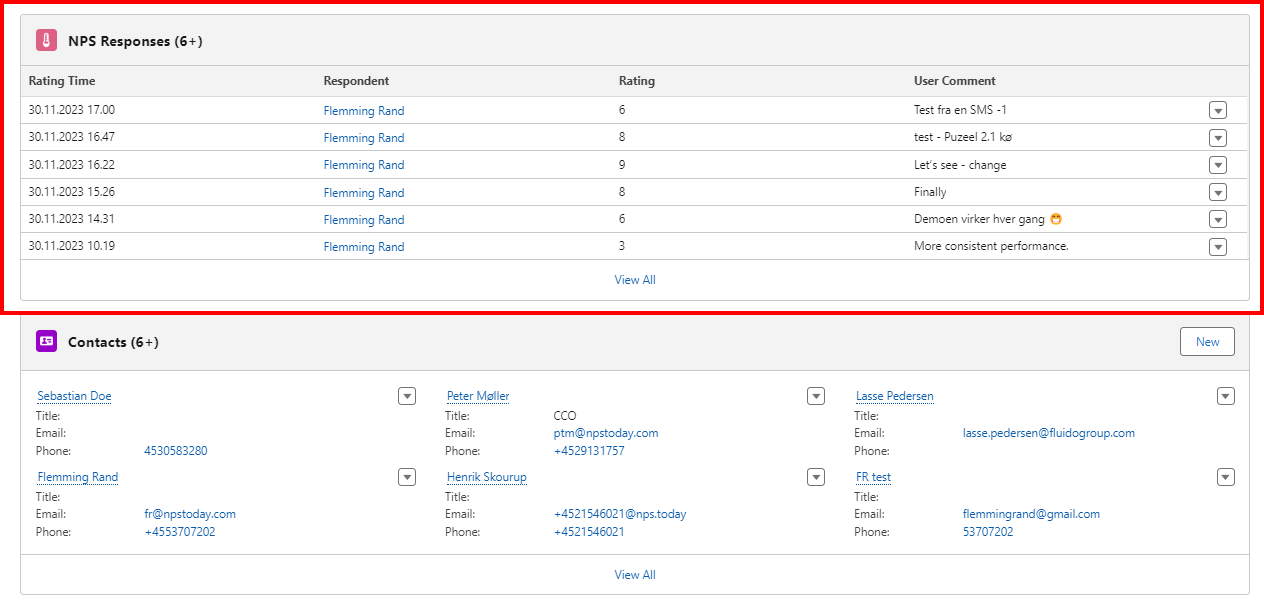
You should now have the NPS Responses on our Account Page.