nps.today Relay
What is Relay?
Relay is a module that works like a logic gate for processing respondents. It can be configured to send the respondent data to an especific endpoint instead of directly sending to the nps.today database. This is useful if you want to apply a custom logic for adding respondents.
When to use Relay?
A common use case is when you want to add respondents to a campaign based on a custom logic. For example, you want to add respondents to a campaign only if certain criterias are met. Since we do not hold this information, you need to write a logic that checks for that in your own system. In this case, you can configure Relay to send the respondent data to a custom endpoint that will check for the amount the customer spent and then, send the data to nps.today.

Limitations
The Relay module is only available for the following integrations:
- Miralix
- Dixa
- 3Kontakt
- Telia Touchpoint
- Dstny
- Tele2
We are working into adding support for other integrations and to manual send outs. Contact our support if you need this feature for your specific integration.
What is in the data sent to the endpoint?
The payload is the same as the one sent to the nps.today API for adding respondents. The differences is that we include the campaignId in the payload.
You can check the payload for adding respondents here.
Here is an example:
[
    {
        "campaignId": 5000,
        "respondent": {
            "address1": "Surveystreet 42",
            "city": "Copenhagen",
            "country": "Denmark",
            "zipCode": "1000",
            "emailAddress": "[email protected]",
            "firstName": "John",
            "lastName": "doe",
            "title": "Mr.",
            "company": {
                "name": "Acme INC.",
                "emailAddress": "[email protected]",
                "industry": "Outdoor Equipment",
            },
            "phoneNumber": "+4512345678"
        },
        "note": "The customer bought several items, seemed very happy",
        "employee": {
            "email": "[email protected]",
            "firstName": "Jane",
            "lastName": "Doe",
            "title": "Customer Relations Expert",
            "department": "Customer Service",
            "team": "A",
            "division": "Nordics",
            "externalId":"jd1234"
        },
        "sender": {
            "email": "[email protected]",
            "firstName": "Jane",
            "lastName": "Doe"
        },
        "doNotContact": false,
        "custom": {
            "key1": "Put any valid json here, note that this is still partly in development",
            "key2": "Some data from a phone system"
        }
    }
]
How to configure Relay?
You need to be an Administrator to configure Relay.
Go in the Account configuration and click on the Relay tab. By default, the Relay is turned off.
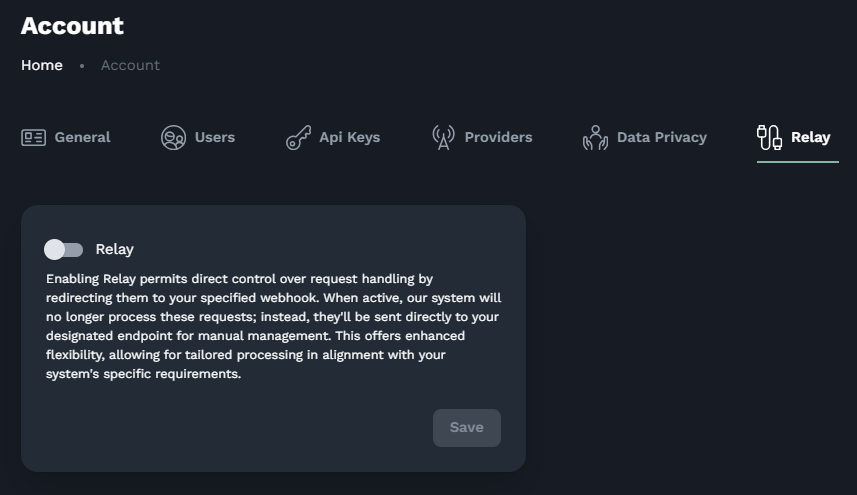
To turn it on, click on the toggle button.
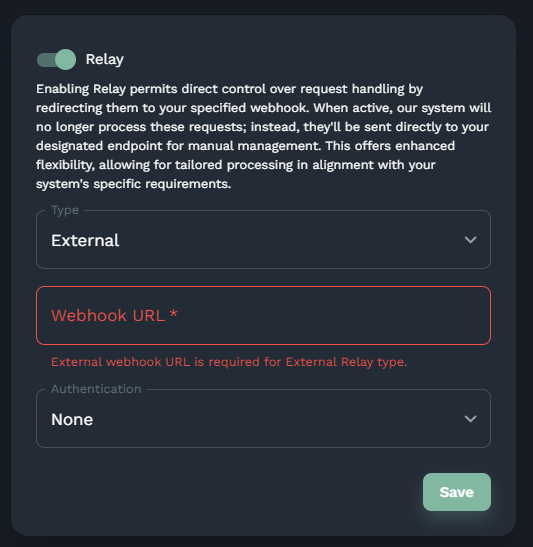
To configure the Relay, you need to provide a URL where the data will be sent. For authentication there are several options:
- None: The data will be sent without any authentication.
- Basic: The data will be sent using the Basic authentication method. You need to provide a username and a password.
- Api Key: The data will be sent using the Api key method. You need to provide a token.
- OAuth: The data will be sent using the OAuth2 method. You need to provide a client id, a client secret, a token endpoint url and a scope (authorization source).
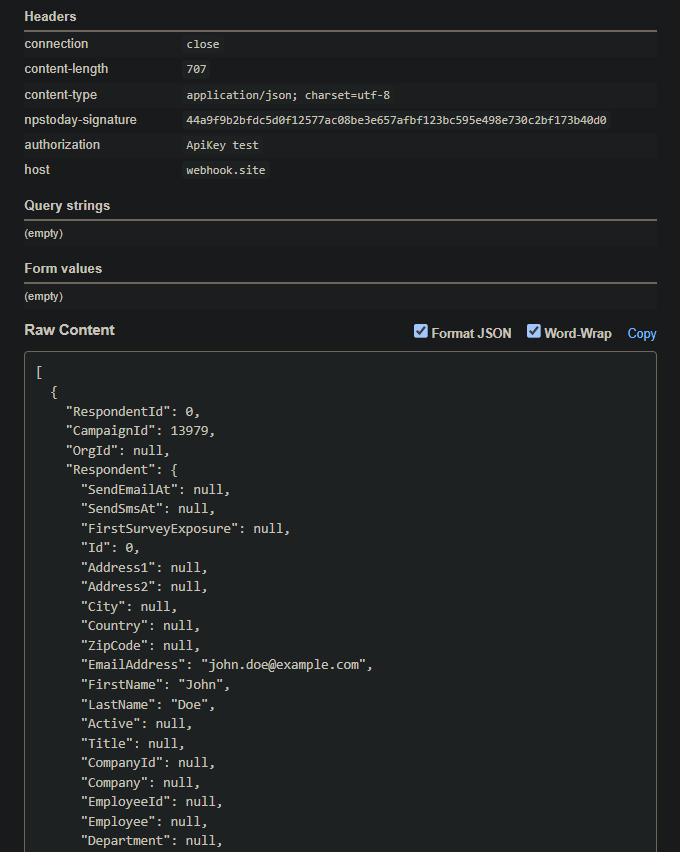
Testing
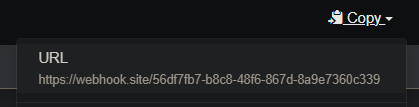
One way to test is sending a POST request to this endpoint, https://functions.nps.today/api/relay/, using a tool like Postman and using a tool like Webhook.site to check the data sent.
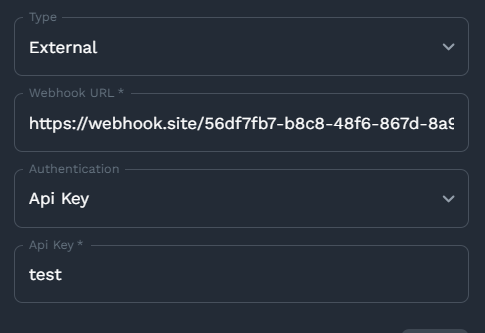
Use the webhook URL as the Relay URL:
Set that as your relay config:
Send a POST request:
curl --location 'https://functions.nps.today/api/relay/' \
    --header 'Content-Type: application/json;charset=UTF-8' \
    --header 'Authorization: Apikey {{apiKey}}' \
    --data-raw '{
        "campaignId": 5000,
        "respondent": {
            "emailAddress": "[email protected]",
            "firstName": "John",
            "lastName": "Doe",
            "phoneNumber": "+4512345678"
        },
        "custom": {
            "callDuration": "some content",
            "val2": 12
        }
    }'