Send surveys with a Screen Flow
This guide provides a step-by-step walkthrough for sending surveys to contacts using a Salesforce Screen Flow. This specific flow is designed to send surveys to all campaign members within a Salesforce Campaign.
Watch how it looks
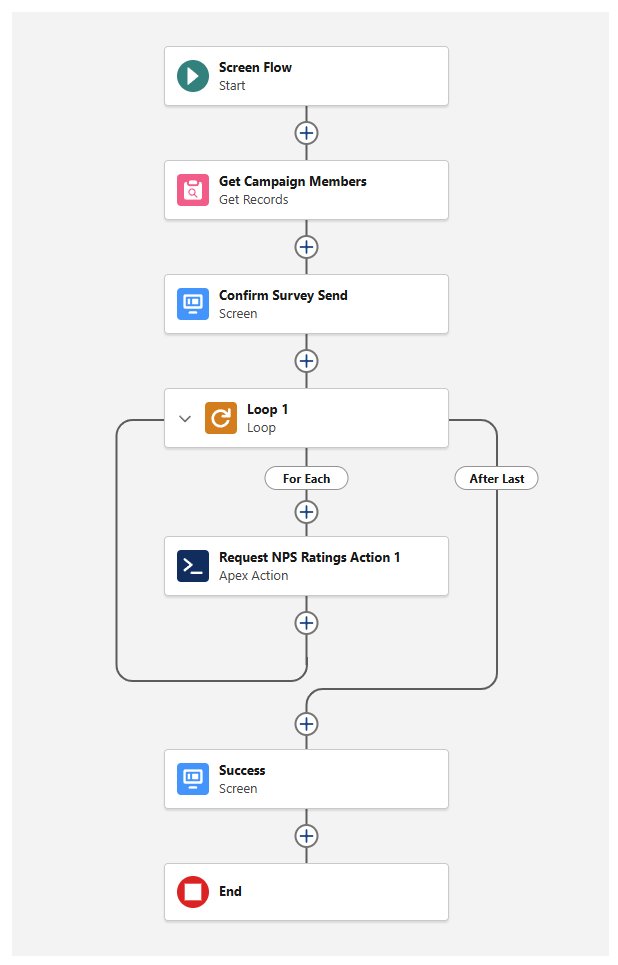
The full survey flow
Prerequisites
- Apex Action: Ensure the
Request NPS Ratingsaction is available in your org. - nps.today CampaignID: Have your specific Survey/Campaign ID ready.
- Permissions: You must have Flow Builder and Object Manager access.
Creating the Flow Foundation
- Navigate: Go to Setup > Flows and click New Flow.
- Select Type: Choose Screen Flow.
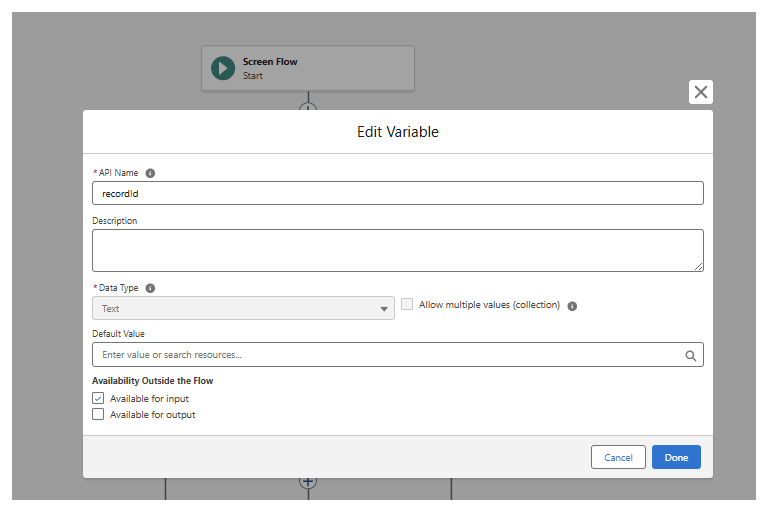
- The Record ID Variable:
- Click New Resource in the left sidebar.
- Resource Type:
Variable. - API Name:
recordId(⚠️ Casing is critical: lowercase 'r', uppercase 'I'). - Data Type:
Text. - Availability: Check Available for input.
- Purpose: This "catches" the Salesforce Campaign ID from the button.
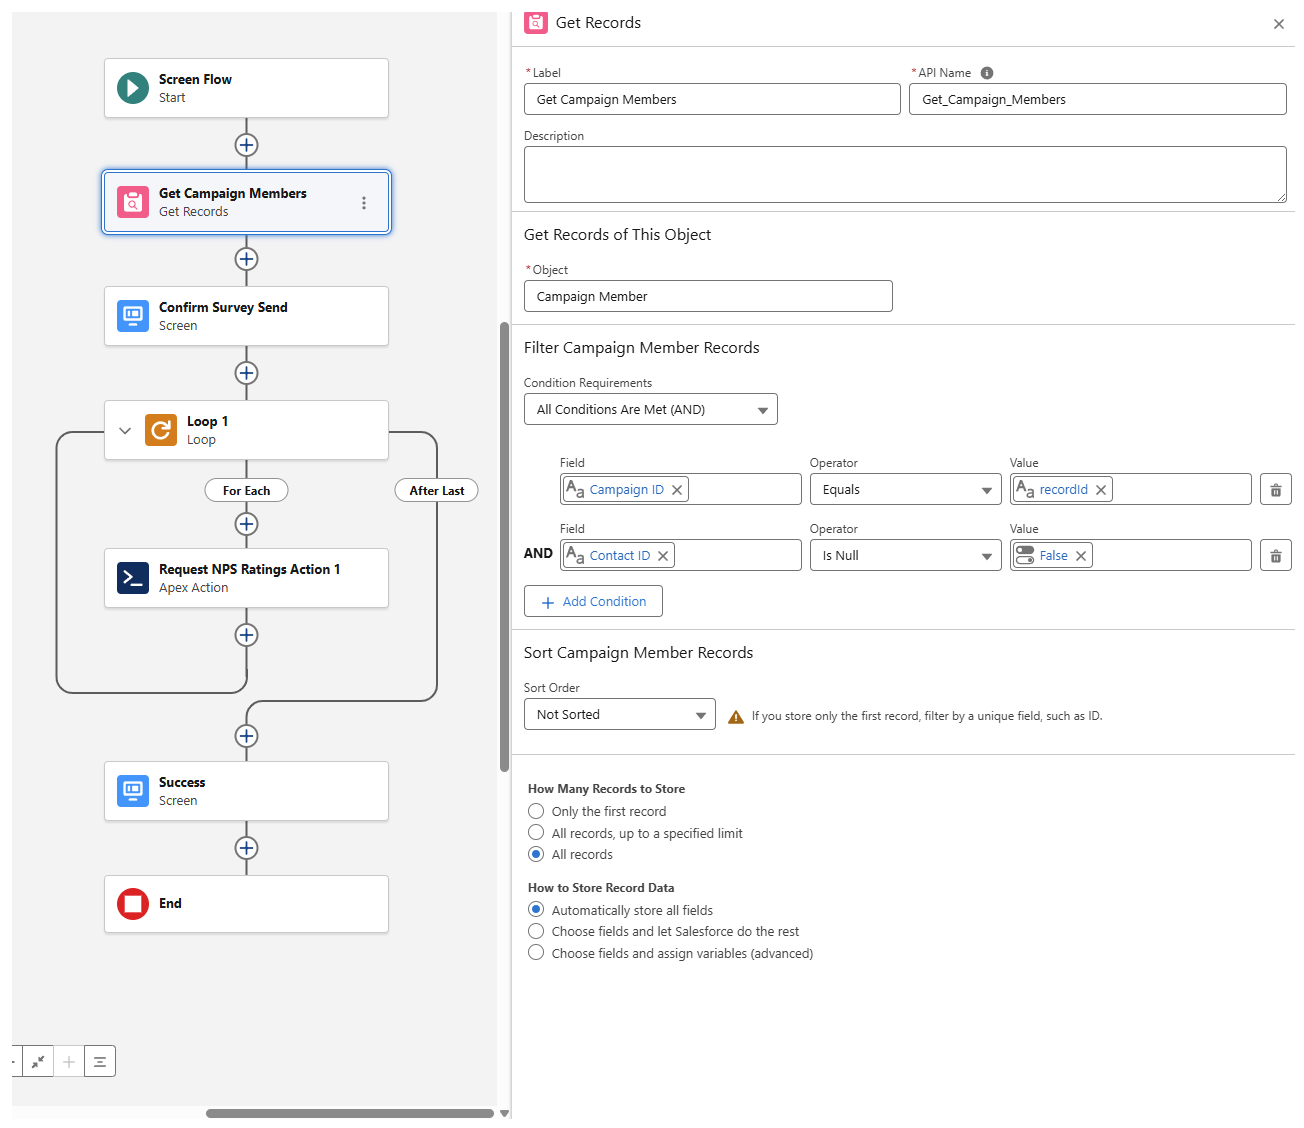
Finding the Recipients
- Add 'Get Records': Click the (+) on the canvas.
- Label:
Get Campaign Members. - Object:
Campaign Member. - Condition Requirements:
CampaignIdEqualsrecordIdContactIdIs NullFalse
- How Many Records: Select All records.
- Storage: Select Automatically store all fields.
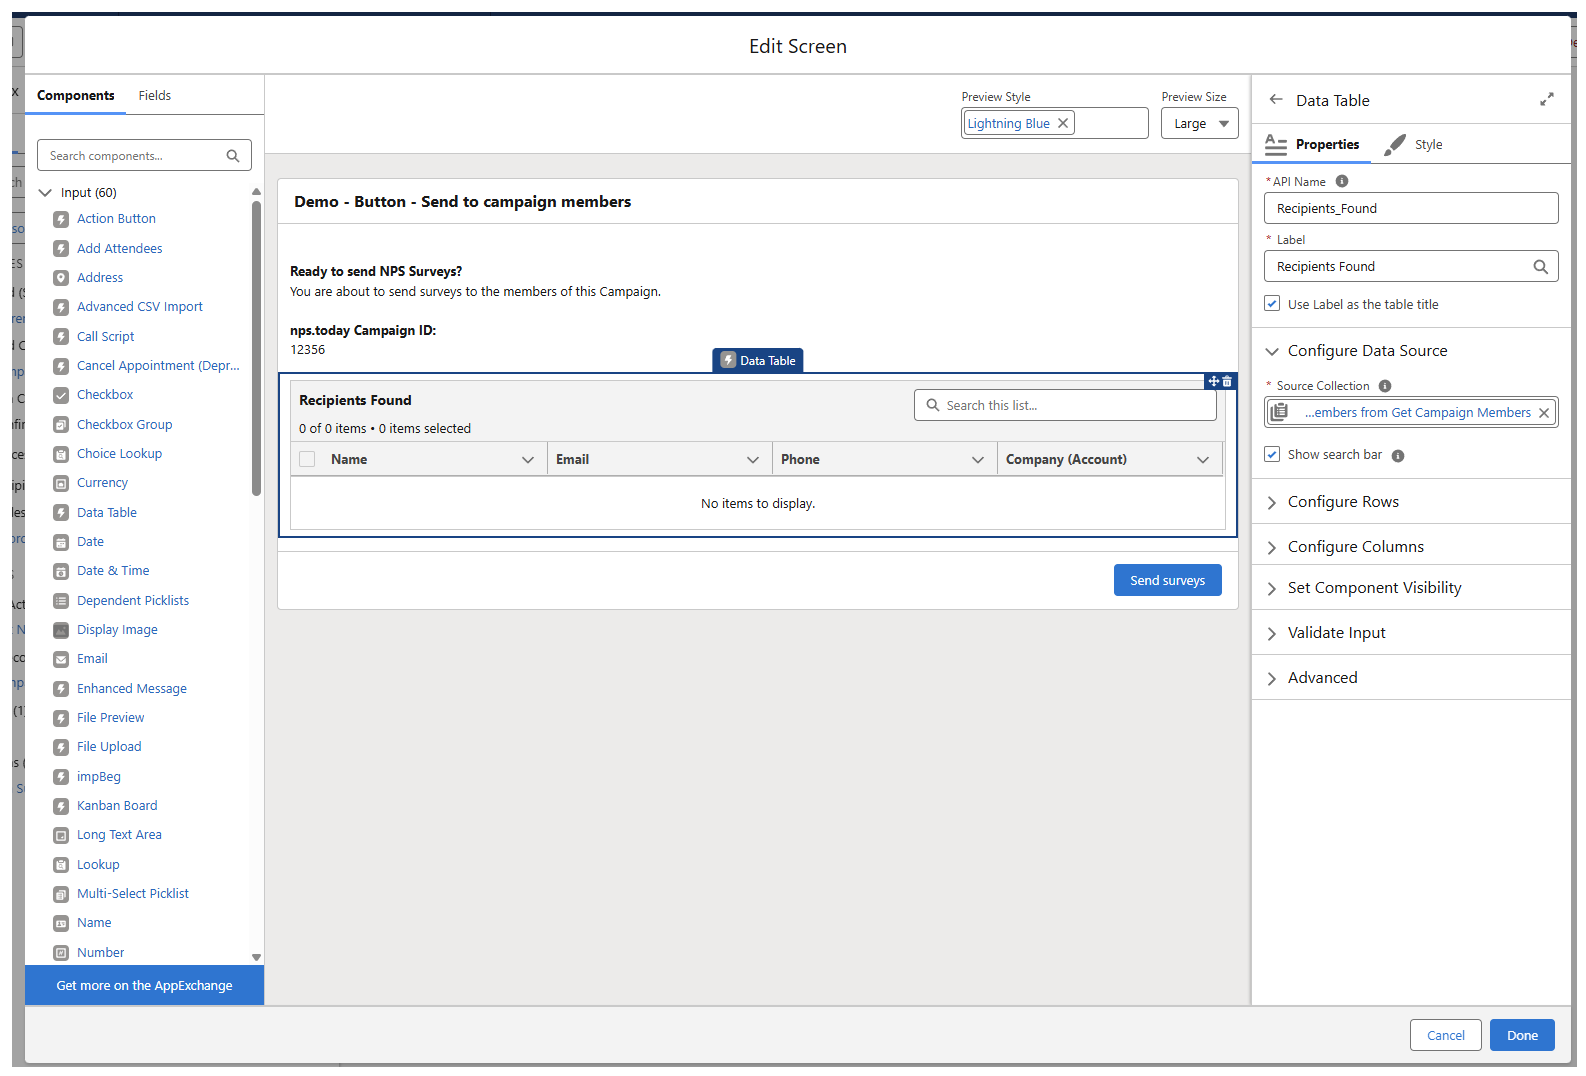
The Confirmation Screen
- Add 'Screen' Element: Click (+) after the Get Records step.
- Label:
Confirm Survey Send. - Configure Footer:
- In the right sidebar, expand Configure Footer.
- Under Next or Finish Button, select Use a custom label.
- Type:
Send Surveys Now.
- Add 'Data Table' Component:
- Drag Data Table from the left components menu onto the screen.
- Source Collection: Select
{!Get_Campaign_Members}. - Configure Columns: Add your preferred columns, e.g., Contact > Full Name and Contact > Email.
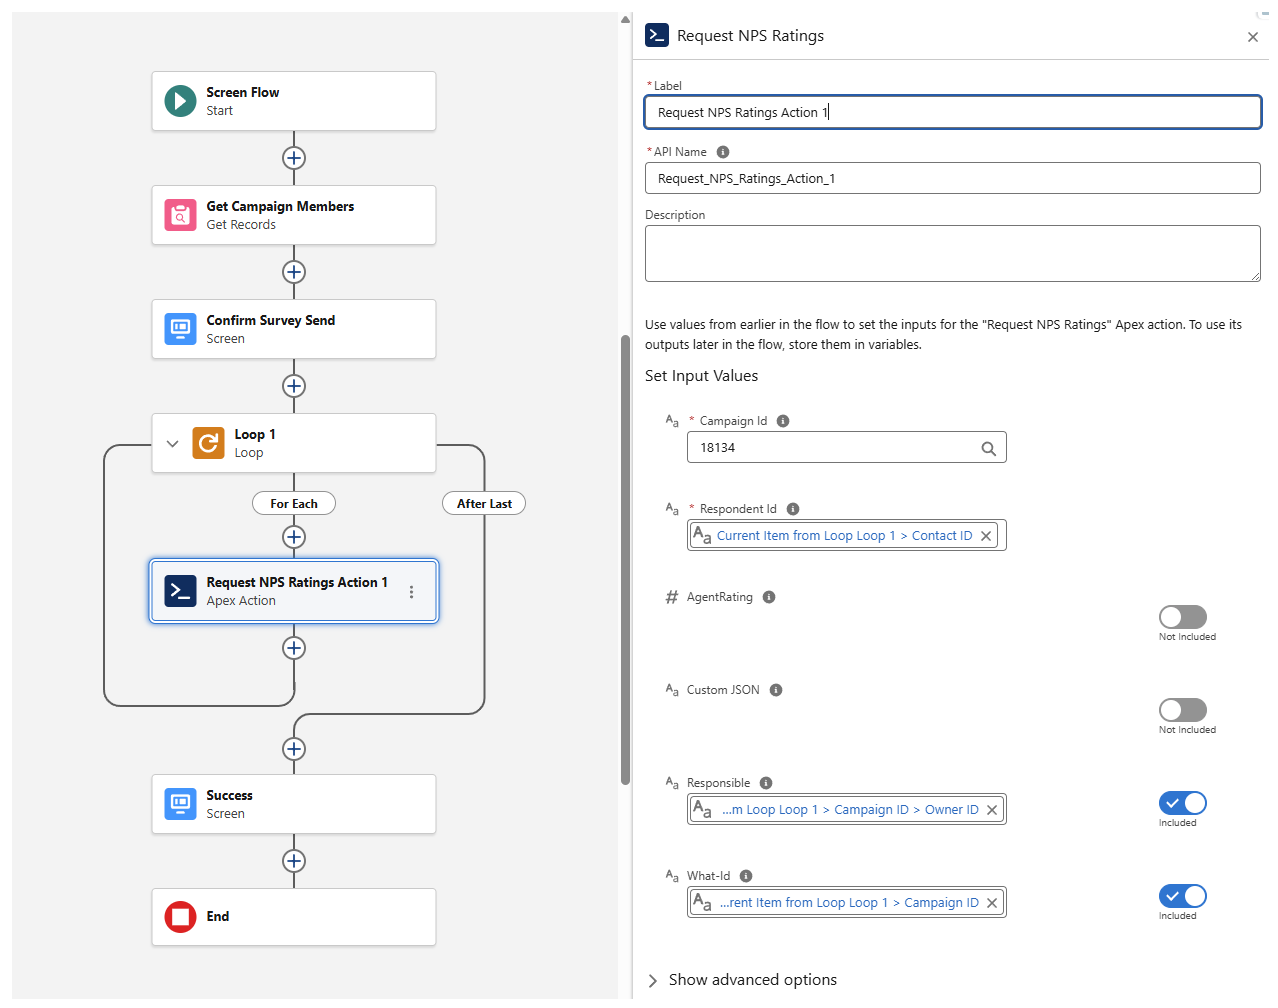
The Sending Loop
- Add 'Loop': Click (+) after the Confirmation Screen.
- Label:
Loop 1. - Collection Variable: Select
{!Get_Campaign_Members}. - Add 'Action' (Inside the Loop): Click (+) on the "For Each Item" path.
- Search: Search for Request NPS Ratings.
- Set Input Values:
- Campaign Id: Type your campaign ID (e.g.,
18134). - Respondent Id:
{!Loop_1.ContactId}. - Responsible:
{!Loop_1.Campaign.OwnerId}. - What-Id:
{!Loop_1.CampaignId}.
- Campaign Id: Type your campaign ID (e.g.,
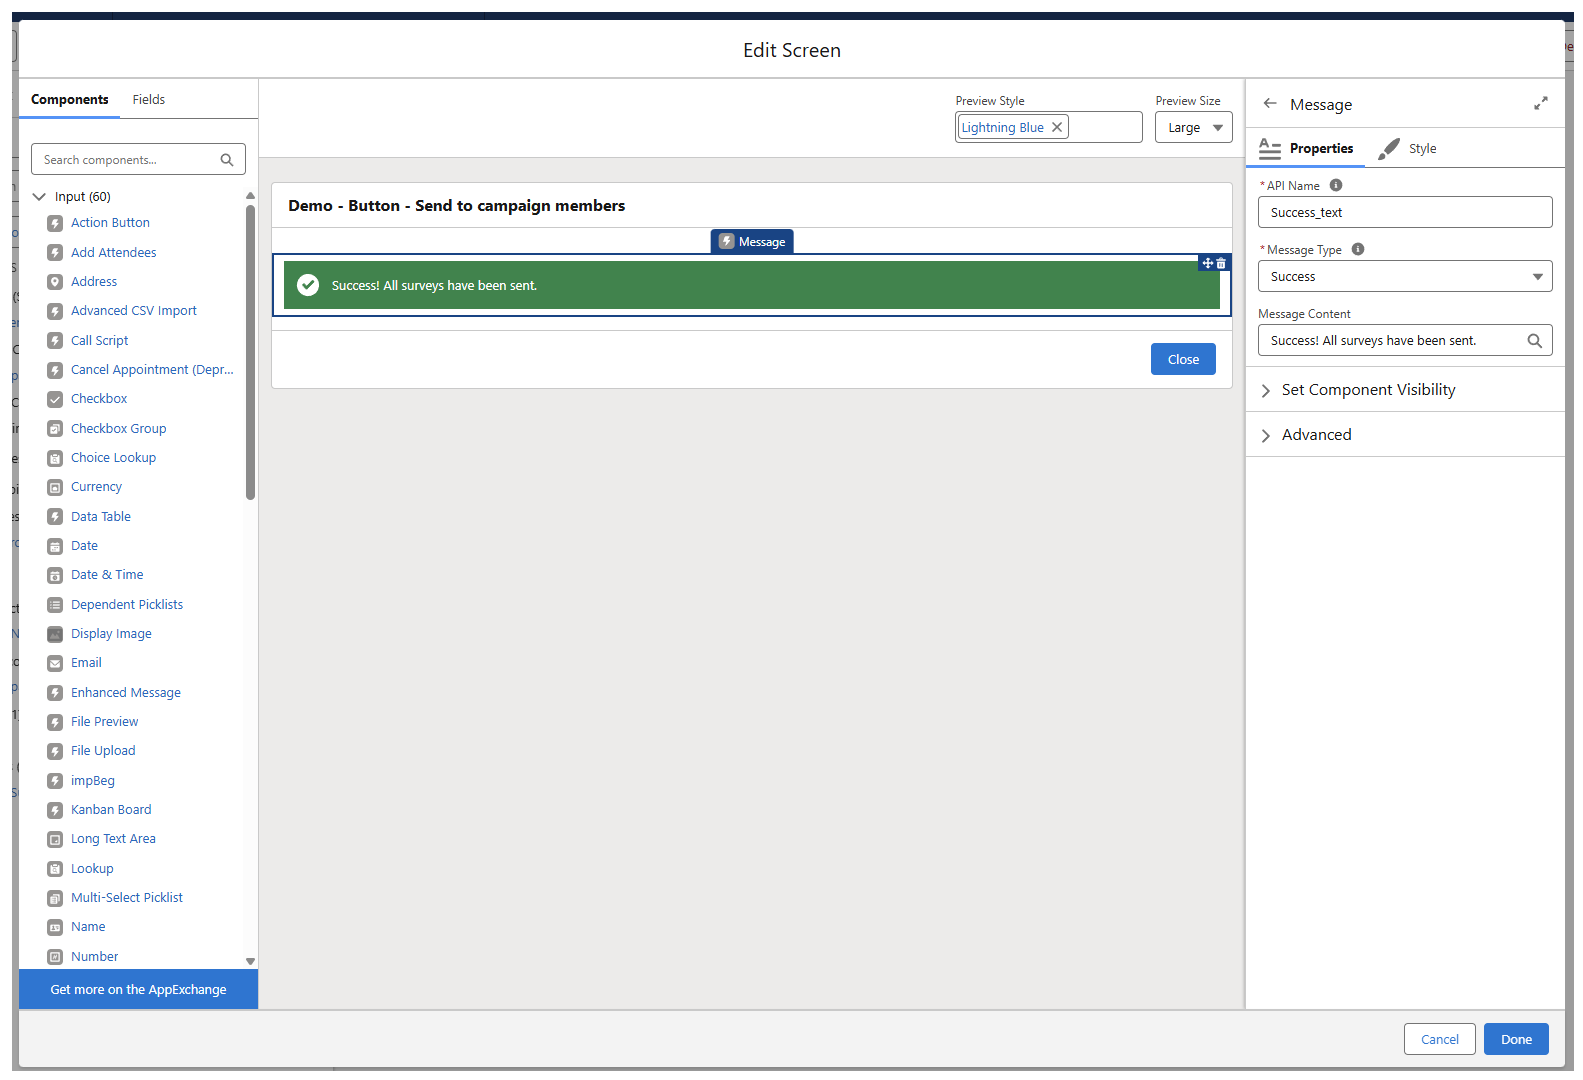
The Success Message
- Add 'Screen' Element: Click (+) on the path labeled After Last.
- Label:
Success. - Configure Footer:
- Under Next or Finish Button, select Use a custom label.
- Type:
Done.
- Add 'Message' Component:
- Drag the Message (or Success Message) component onto the screen.
- Message Content:
Success! All surveys have been sent. - Message Type: Select Success (this generates the green background).
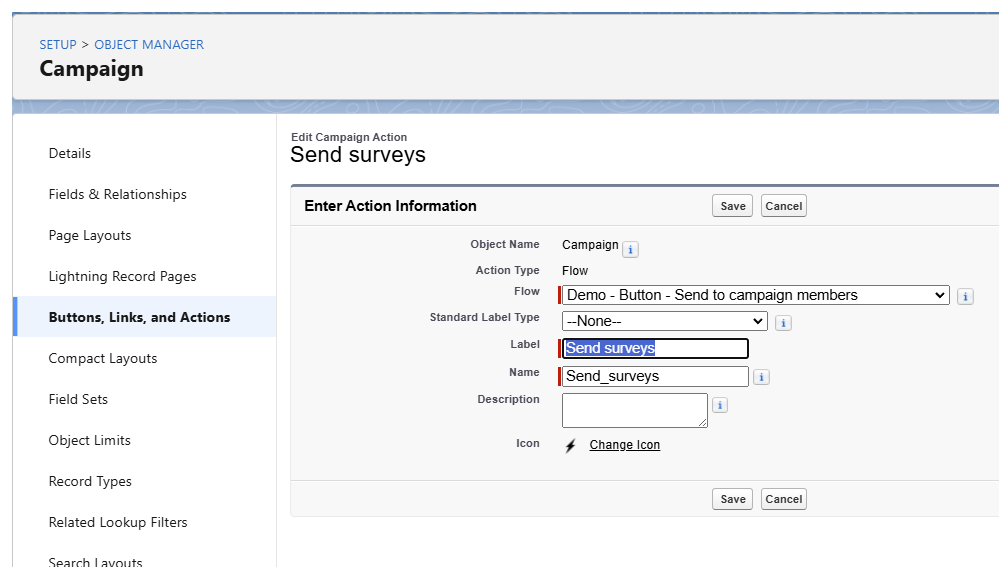
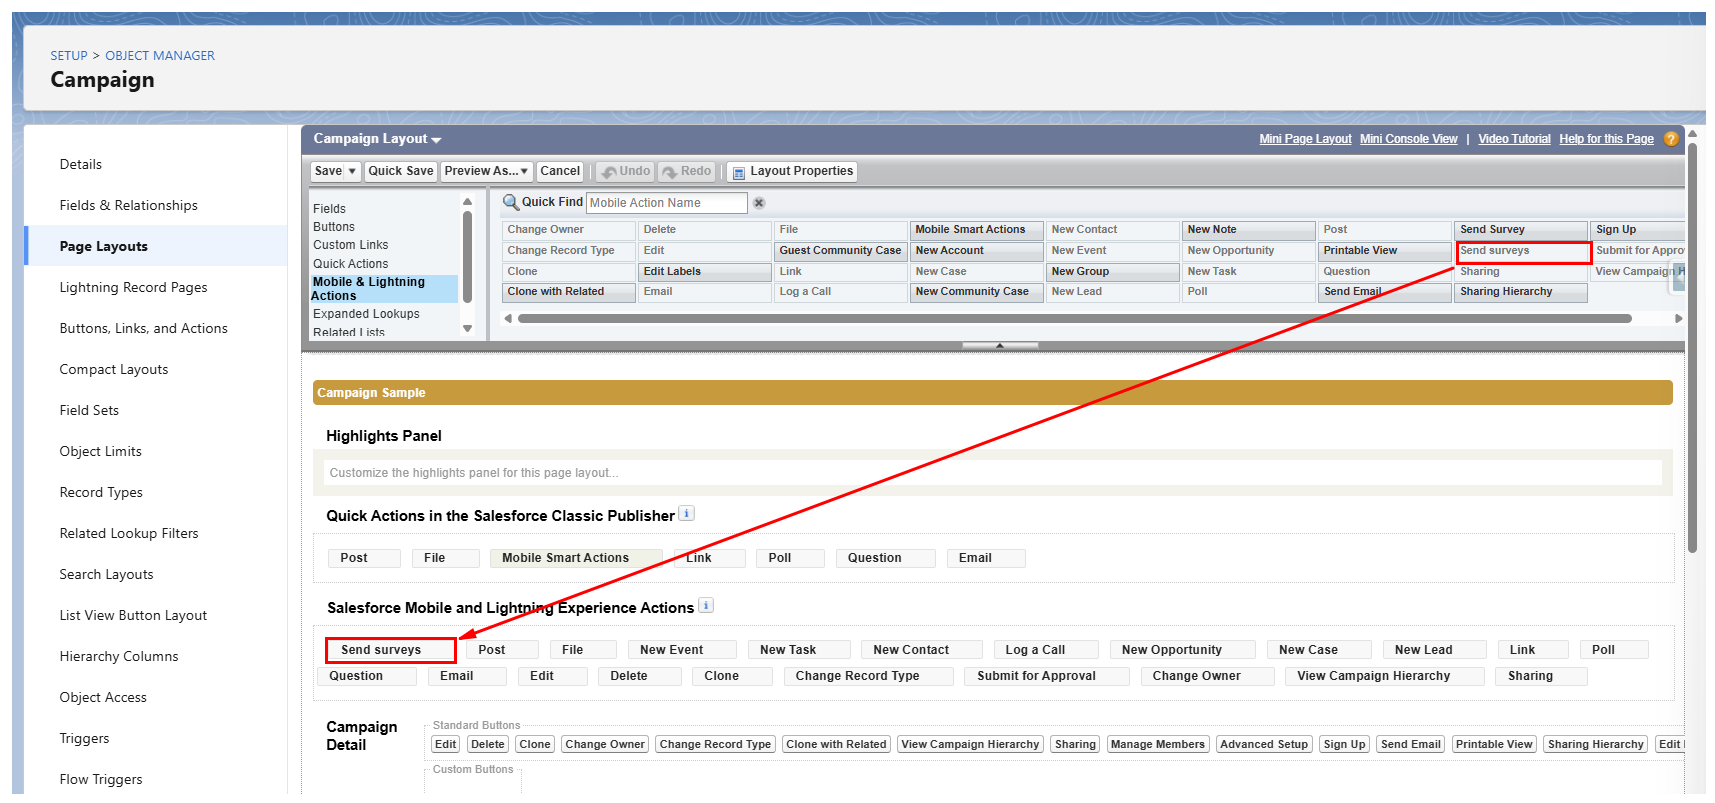
Deployment (The Button)
- Object Manager: Go to Object Manager > Campaign > Buttons, Links, and Actions.
- New Action: Click New Action.
- Action Type:
Flow. - Flow: Select your new Flow.
- Label:
Send NPS Surveys.
- Action Type:
- Update Page Layout:
- Go to Campaign Page Layouts.
- Click Mobile & Lightning Actions in the top palette.
- Drag Send NPS Surveys into the Salesforce Mobile and Lightning Experience Actions section.
Troubleshooting
- Empty Table? Ensure the Campaign Members are added as Contacts and not Leads.
- Action Missing? Ensure the
nps.todaypackage is properly licensed and that the Apex class is accessible to the user's profile.