User permissions
This guide explains the permissions you can give a user and what each one lets that user do and see on the platform. You manage these from the Permissions table, which you reach by editing a user. To create a user in the first place, see Add a user.
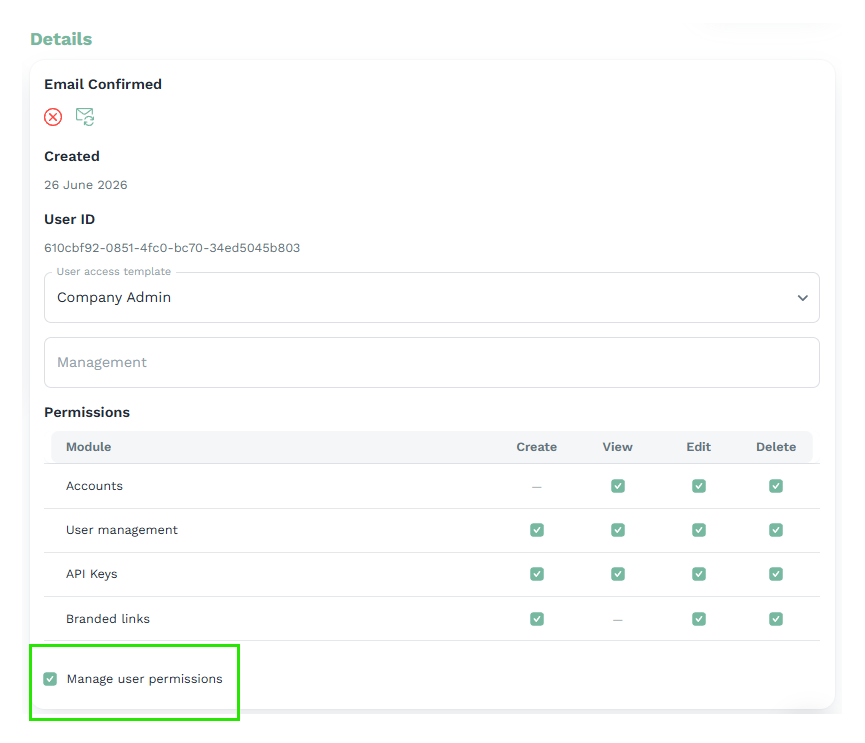
The Permissions table
When you edit a user, the Permissions section shows a table. Each row is an area of the platform (a module) and each column is an action you can allow for that area.
| Column | What it allows |
|---|---|
| Create | Add new items in that area |
| View | See the items in that area |
| Edit | Change existing items |
| Delete | Remove items |
Tick the actions you want the user to have. A few rules govern how the table behaves:
- View turns on automatically. When you select Create, Edit or Delete, View is enabled for you and locked on, because a user who can change something can always see it. On screen this appears as "Read is granted automatically when create, update or delete is selected."
- A dash (—) means there is no separate box for that action in that row. For example, Branded links has no View box because viewing is bundled with any branded-link action, and accounts cannot be created from here.
- You can only grant permissions you are allowed to manage. Granting permissions to others requires the Manage user permissions permission described further down on this page.

Permissions
Accounts
Access to your account and organization settings.
- View the account's general settings and its login and authentication configuration.
- Edit those settings, for example saving changes and changing the account logo.
A user with View can open the account and see its details, and adding Edit lets them change the settings rather than only viewing them.
User management
Manage the people who belong to the account.
- Create invites or adds new users (the Add user button).
- View the user list and opens individual user details.
- Edit a user's basic information, such as their name and address.
- Delete removes users from the account (the Delete users button).
With these, the user sees the account's users and can add, change or remove them according to the actions you allow.
Manage user permissions
Lets the user change which permissions other users have.
This is the permission that controls the Permissions table itself. With it, a user can edit other users' permissions.
Trusted administrators
Only give it to trusted administrators, because anyone who has it can grant any of the other permissions on this page to themselves or to others.
API Keys
Manage the API keys used for integrations and external systems.
- Create, View, Edit and Delete API keys.
A user with this permission sees the API Keys area within the account's authentication settings, with the create, edit and delete controls matching the actions you allow. For the steps to generate a key, see How to create an API key.
Branded links
Manage branded (custom) links.
- Create, Edit and Delete branded links.
There is no separate View action for branded links. A user sees the Branded links area only once they have at least one of these actions, and viewing comes automatically with any of them. A user with no branded-link action cannot see branded links at all.
See more abount branded links here.
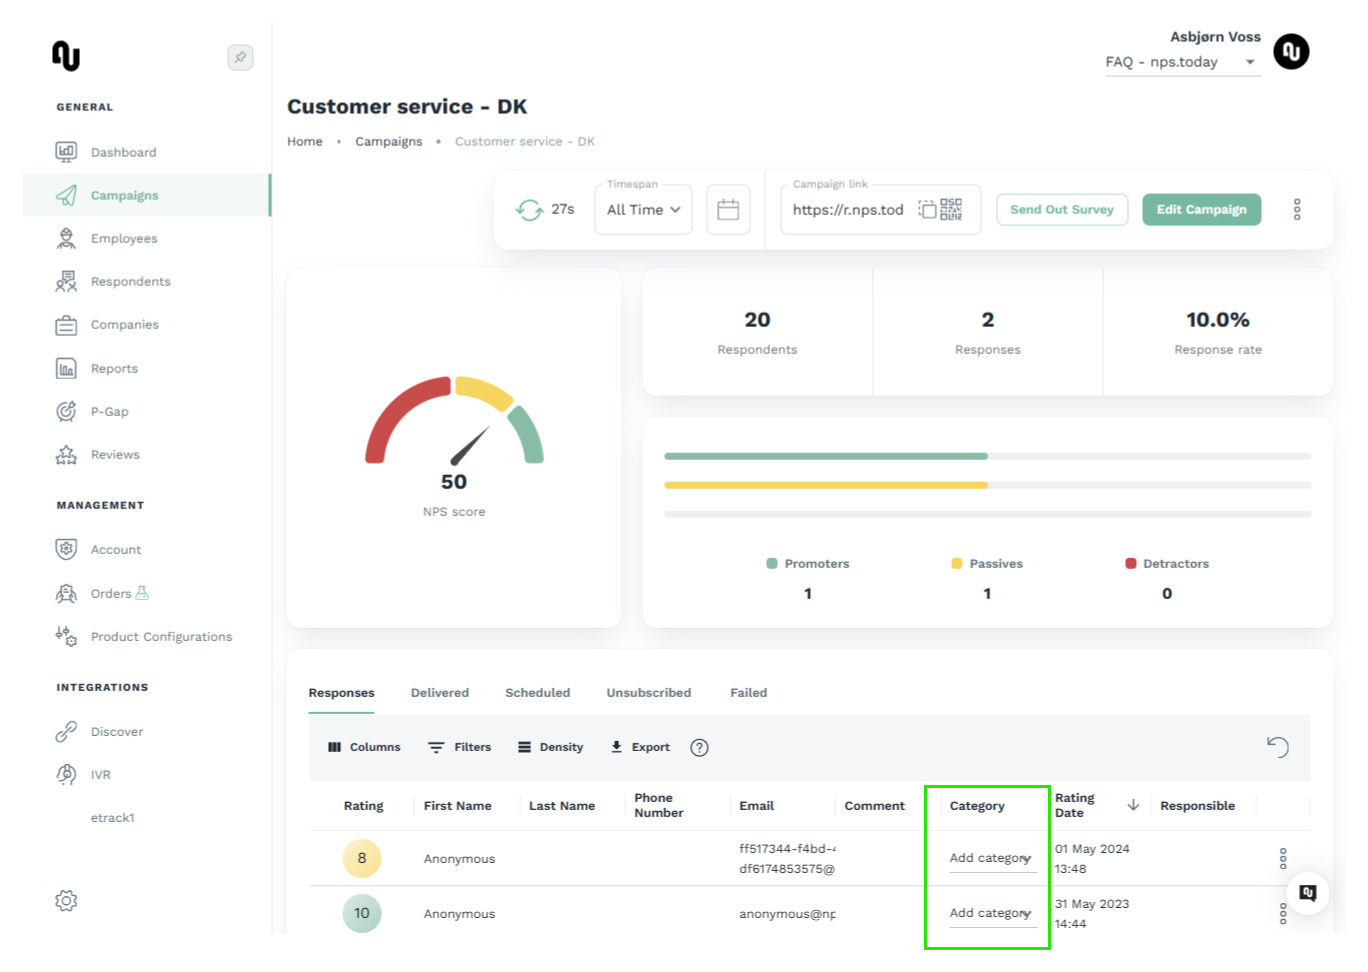
Response
Lets a user update an existing (already submitted) survey response.
- Edit an existing response.
In the grid this row shows only an Edit action. Create, View and Delete are not applicable and appear as a dash. What this permission controls in the interface is the response category.
With the permission, the category selector on a response is editable, so the user can assign or change a response's category. Without it, the category is shown read-only.
Campaign selector examples

Campaign manager
This permission is part of the Campaign manager access template by default, so a user set up as a Campaign manager gets it without ticking the box.
AI feedback assistant
The AI feedback assistant feature must be enabled on the account
This permission only controls who may use the assistant. Before you can manage or grant it, the AI feedback assistant feature itself needs to be enabled on the account by nps.today. If you can't see the permission the feature is not enabled for your account.
Contact nps.today support to get this feature.
This permission lets the user interact with the AI feedback assistant and prompt it about the organization's data.
- View (use) the AI feedback assistant.
With this permission the user sees the AI entry in the sidebar and the AI buttons on the dashboard and campaign pages, and can open the assistant.