Add a user
This guide walks you through adding a new user to your nps.today account, choosing an access template, and confirming the user. For a full explanation of what each permission grants, see User permissions.
Prerequisites
- An nps.today account.
- You are signed in as a user with the User management → Create permission, which is what shows the Add user button.
- To adjust the new user's individual permissions or let them manage other users, you also need the Manage user permissions permission.
Add a new user
In short, open Account → Users, click Add user, choose an access template, enter the email, and confirm. The video below shows the whole flow, and the written steps follow underneath.
1. Open the Users section
Go to Account in the sidebar, then open the Users tab. You will see the list of users on the account displayed on screen.
2. Open the Add user form
Click Add user in the top right corner. The Add user form opens, ready for input.
3. Choose a user access template
Open the User access template dropdown and pick a template. Each template comes with its own set of permissions, so the one you choose sets the user's starting permission level. For an administrator, choose Company Admin.
4. Enter the user's email
Type the new user's address in the Email field. Check that it is spelled correctly, because this is the address the verification email is sent to.
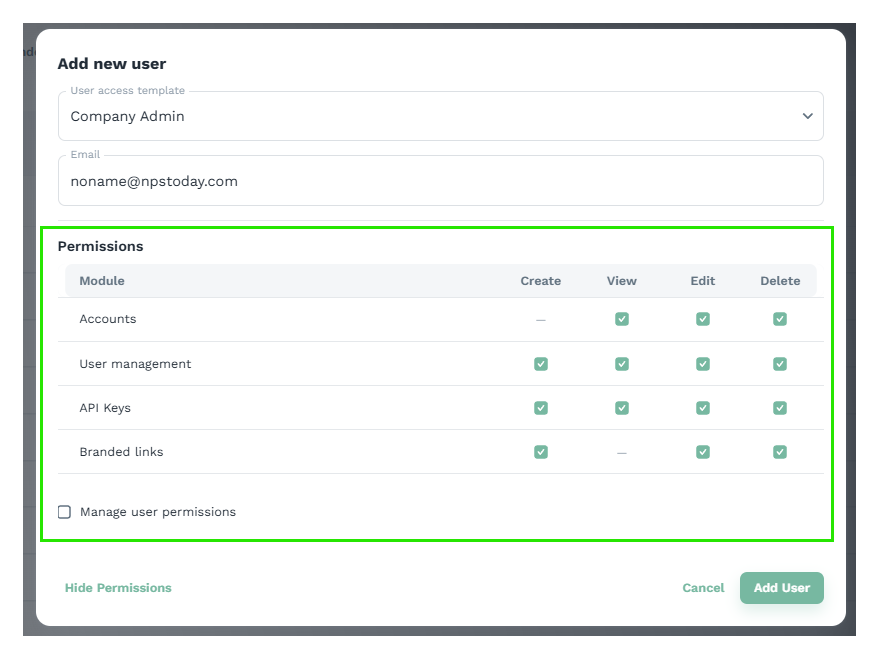
5. Review permissions
This step is optional but worth doing before you confirm. Click View permissions to see exactly what access the selected template grants. You can also toggle individual permissions on or off from here.
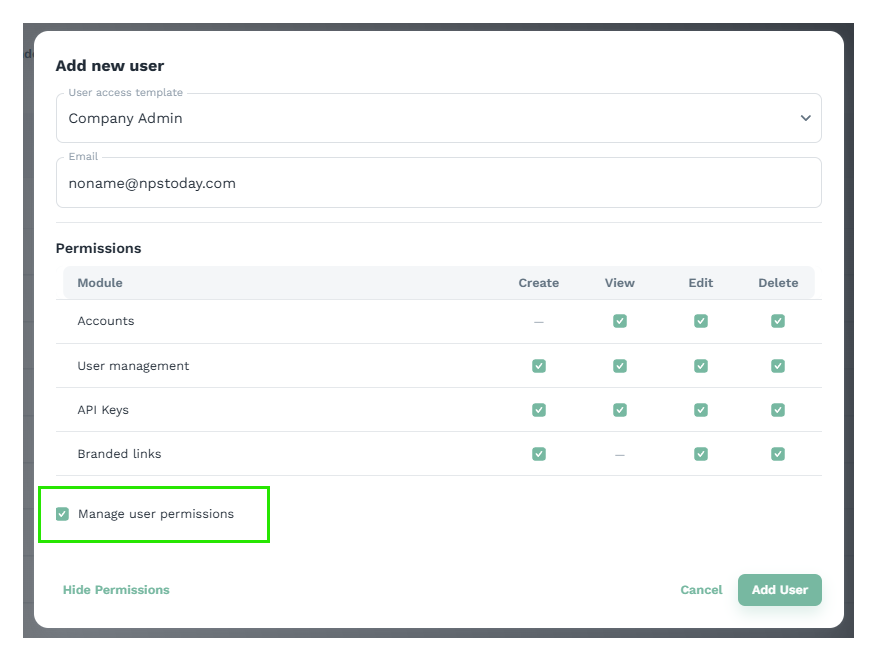
6. Allow this user to manage permissions
Tick the Manage user permissions box if this user should be able to control permissions for other users. Only give this to people you trust, because anyone who has it can grant any of the other permissions to themselves or to others. See User permissions for more.
7. Add the user
Click Add user in the bottom right to confirm. The user is created and a verification email is sent to the address you entered, where the new user finalizes the profile and creates a password.
That is the new user added and confirmed.
Result
The new user appears in Account → Users. Once they open the verification email and finalize their profile, they can sign in with exactly the access you granted. To change that access later, open the user (with a user who has the User Management permission) from the Users list and adjust the Permissions table.